
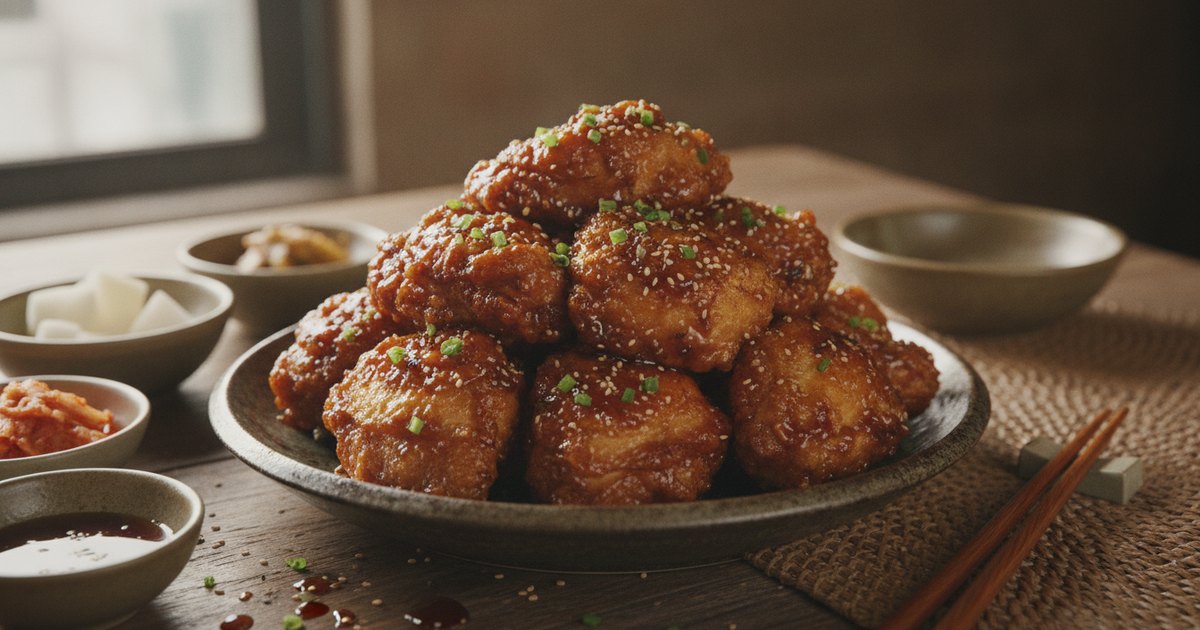
The sequence happens fast when you bite into Korean soy garlic fried chicken for the first time: a sharp crack of lacquer-thin crust, then a wave of sweet-savory umami and roasted garlic, then the yielding juiciness of chicken thigh underneath. It doesn't just taste good — it works on every textural and flavour dimension simultaneously. This is dakgangjeong (닭강정) in a ganjang (간장, soy sauce) and garlic glaze, and it's one of the most rewarding things you can make in a home kitchen with a pot of oil and thirty minutes to spare.
Unlike the fire-forward yangnyeom-chikin, soy garlic Korean fried chicken leads with deep umami sweetness and a caramelized garlic fragrance that makes the whole kitchen smell incredible. It's accessible to just about every palate, which is probably why it's become one of the most popular Korean fried chicken styles among home cooks outside Korea. This guide covers everything: the ingredient choices, the double-fry technique, the glaze, and — critically — the mistakes that separate a good result from a great one.
What Is Dakgangjeong?
The term dakgangjeong (닭강정) refers specifically to bite-sized pieces of chicken, fried until crisp, then tossed in a sweet and sticky glaze. It's distinct from the broader category of Korean fried chicken (치킨, chikin) which typically means larger bone-in pieces with a thin, shatteringly crisp batter — a style that exploded in popularity from the 1970s onward as American-influence frying techniques merged with Korean seasoning traditions, according to historical food writing on the genre.
Ganjang-chikin (간장치킨) — literally "soy sauce chicken" — describes any Korean fried chicken finished with a soy-and-garlic glaze, and the term is often used for wings or whole pieces too, not only the bite-sized dakgangjeong cut. In practice, you'll find both terms used interchangeably for the soy-garlic flavour profile. What we're making here is the bite-sized, sticky-glazed version — classic dakgangjeong technique, ganjang (soy-garlic) sauce.
If you're exploring Korean fried chicken styles more broadly, our complete Korean fried chicken guide maps out the full landscape, from yangnyeom to plain crispy to this soy-garlic style, with a comparison of what makes each one distinct.
Why This Flavour Profile Works
The soy garlic glaze is a study in deliberate balance, and understanding each component helps you adjust it confidently:
- Soy sauce provides the umami foundation, saltiness, and dark amber colour. Regular Korean or Japanese soy sauce is correct here. Low-sodium works but produces a slightly thinner, less intensely savoury glaze.
- Rice syrup (mulyeot, 물엿) is the most important ingredient people outside Korea skip, and it makes a real difference. Unlike honey or corn syrup, mulyeot reduces to an almost hard-candy shell on the surface of the chicken, keeping the glaze crisp longer. Find it at H Mart or any Korean grocery. Light corn syrup is the best substitute; honey works but produces a softer glaze.
- Mirin adds gentle sweetness and helps the sauce emulsify smoothly.
- Brown sugar promotes caramelization — the sauce should develop a faintly toasty, almost toffee-like note as it simmers.
- Fresh garlic is non-negotiable and must be bloomed in oil before the sauce is added. This step converts the raw, harsh allicin compounds into mellow, sweet, complex flavour. Garlic that browns turns bitter — pale gold is the target.
- Sesame oil is added entirely off-heat. Cooking sesame oil destroys the nutty fragrance within seconds; adding it after the pan leaves the stove preserves the aroma that makes the glaze smell so compelling.
Ingredients: What to Buy and Where
The Chicken
Boneless chicken thighs are the right choice — universally preferred in Korean recipes for this dish. The fat content keeps the meat moist through two rounds of frying, and the irregular surface texture grips the starch coating better than the smooth, lean breast. Cut pieces to approximately 4 cm (1½ inches) — consistent sizing is critical for even cooking.
Chicken wings (drummettes and flats, tips removed) are an excellent and very traditional alternative, especially for serving as an appetiser or party food. They're bone-in, so adjust: first fry 6–7 minutes, second fry 3–4 minutes.
If you must use breast meat, cut pieces slightly larger, reduce the first fry temperature to 160°C (320°F), and use an instant-read thermometer — breast meat is cooked at 74°C (165°F) internally and dries out quickly past that point.
The Starch
Use cornstarch or potato starch — not all-purpose flour. Starch produces a thinner, crispier coating that fries faster and holds up better under a wet glaze than a flour-based batter would. Potato starch gives a marginally crispier, more delicate result and is considered superior by many Korean cooks; cornstarch is easier to find and produces an excellent outcome. Both are available at H Mart, Asian supermarkets, or online. At standard US grocery chains, Bob's Red Mill potato starch is reliable and widely stocked near alternative flours.
The Rice Wine
Korean cheongju (청주) or Japanese sake are ideal for the marinade. Dry sherry (not sweet cooking sherry) is the most accessible Western substitute. The purpose: light tenderizing and neutralizing any gamey notes from the thigh meat.
For a comprehensive guide to stocking your Korean pantry in one trip, our H Mart shopping guide breaks down exactly what to look for and what aisle it's in.
Equipment
No deep fryer needed. A Dutch oven or deep, heavy-bottomed pot with at least 6 cm (2.5 inches) of oil is ideal — the mass of the pot retains heat better when chicken hits the oil. A digital thermometer is genuinely non-negotiable: the difference between 160°C and 190°C (320°F and 375°F) determines the texture of your final crust, and you cannot reliably judge this by eye or by a chopstick bubble test alone. A spider skimmer (the wide-mesh wire tool) transfers chicken without breaking the crust or losing starch. A wire rack set over a baking sheet is essential — paper towels trap steam and turn a crispy crust soggy within minutes.
The Double-Fry: The Technique That Makes This
Every authentic Korean fried chicken recipe uses a two-stage fry. This is not a restaurant trick that's too complicated for home cooking — it's a straightforward two-step process that takes about 15 minutes total, and the difference in crunch is dramatic enough to be immediately obvious.
First fry at 170°C / 340°F, 4–5 minutes: This cooks the chicken through and sets the starch coating to a pale gold. The lower temperature allows the interior to cook evenly without the exterior darkening too quickly. At this stage, the crust is set but not yet fully crisp.
Mandatory rest, 5+ minutes: Resting on a wire rack allows interior steam to migrate outward and escape. This is the step most home cooks skip and most regret. Steam that remains trapped will push through the crust during the second fry, softening it from the inside. You can rest the chicken up to 30 minutes if you're cooking large quantities in batches.
Second fry at 190°C / 375°F, 2–3 minutes: With minimal interior moisture remaining, the high heat drives the last surface moisture out of the coating. The crust turns deeply amber, almost rigid, and develops the characteristic crackle you can hear across the kitchen. This is the result that makes people reach for a second piece.
Glazing: Speed Is Everything
Once you've tossed the fried chicken in the warm soy garlic sauce, you have a window of roughly 10–15 minutes of optimal texture before the glaze begins to soften the crust. Plan to serve immediately. Have your plates, garnishes, and any side dishes (steamed rice, pickled daikon) ready before you glaze.
The sauce should be warm and fluid when the chicken goes in — not cold (it'll clump) and not boiling hard (it'll over-reduce and seize). Medium-low heat, barely bubbling, is correct. Toss for 30–60 seconds. Every piece should look uniformly lacquered, not splotchy.
Dakgangjeong is traditional Korean comfort food, often served as a shared main dish alongside rice. It pairs beautifully with tteokbokki as part of a Korean snack-food spread — the sweet-spicy rice cakes and the sticky soy-garlic chicken complement each other well.
Common Mistakes to Avoid
1. Skipping the Rest Between Fries
The result: crust that's crispy but not truly crunchy — slightly leathery, with a soft interior layer just under the starch. It tastes fine but lacks the dramatic crack of properly double-fried chicken. Fix: set a timer. Five minutes minimum; ten is better. There's no shortcut here.
2. Letting Oil Temperature Drop Unnoticed
When cold marinated chicken hits hot oil, the temperature can drop 20–30°C (35–55°F) if you've overcrowded the pan. The symptom is auditory: a vigorous, crackling, high-pitched sizzle means your oil is at working temperature; a slow, low, wet gurgle means you're steaming the chicken, not frying it. The starch will absorb oil rather than crisping, and the chicken will be greasy. Fix: cook in smaller batches (6–8 pieces maximum in a standard 4-quart pot), and give the oil 2–3 minutes to recover between batches. Watch the thermometer, not the clock.
3. Coating That Slides Off or Clumps Into Dough
If it slides: You've dried the chicken too thoroughly before dredging. The surface moisture is the adhesive — without it, the starch doesn't bond. If it clumps: The chicken is too wet and the starch has over-hydrated. Shake off excess starch firmly before the coating sets. The ideal dredged piece looks evenly powdery with no bare patches and no visible wet clumps. Resting the coated pieces 5–10 minutes before frying allows the starch to hydrate evenly and adhere reliably.
4. Glaze That's Too Thin or Too Thick
Too thin: It runs straight off the chicken and pools on the plate. Cause: insufficient reduction, or sauce was not warm when chicken was added. Fix: return the chicken and sauce to the pan, increase heat slightly, and toss an extra 30 seconds. Too thick: The glaze seizes in sticky, uneven lumps rather than coating smoothly. Cause: overreduction, or chicken was cool when glazing. Fix: thin the sauce with a teaspoon of warm water before tossing, and make sure both the chicken and the sauce are at least warm.
5. Glazing Chicken That Has Cooled Down
If the fried chicken sits for more than 20 minutes before glazing, the sauce will not distribute evenly — it hits cool surfaces and sets unevenly before you've finished tossing. Fix: re-crisp the cooled chicken in a 200°C (400°F) oven for 5 minutes before glazing.
6. Garlic That Burns in the Sauce
Burnt garlic is irreversible and turns the entire glaze bitter. The smell is unmistakable — acrid and sharp rather than sweet and roasty. If it happens, discard the garlic and start the sauce fresh (the other ingredients are inexpensive; it's not worth saving a burnt batch). Fix: medium-low heat, constant stirring, and pull the garlic off the heat the moment it shows pale gold at the edges. It continues cooking from residual heat for another 15–20 seconds after you add the liquids.
FAQ
Can I make this ahead of time?
The sauce keeps refrigerated in an airtight container for up to 2 days. The chicken can be carried through the first fry, cooled, and refrigerated (uncovered on a rack) for up to 4 hours. When ready to serve, bring oil to 190°C (375°F) and do the second fry directly from cold — add about 1 minute to the second fry time. Once glazed, the chicken is best eaten within 15 minutes. Leftovers can be revived in an air fryer or oven at 200°C (400°F) for 5–7 minutes, but full crunch will not fully return.
What's the difference between soy garlic and yangnyeom chicken?
Yangnyeom-chikin (양념치킨) uses a bright red sauce built on gochujang and gochugaru — it's spicy, tangy, vivid in colour, and noticeably more aggressive in flavour. Soy garlic is umami-sweet, amber-coloured, and has no meaningful heat. Both are glazed Korean fried chicken, both use the double-fry technique, but they taste and look completely different. Our Korean fried chicken guide covers both in detail with a full side-by-side comparison.
Can I use an air fryer instead of deep frying?
An air fryer produces a decent result but not the same shatteringly crisp crust. If you go that route: dredge as directed, spray generously with neutral oil, cook at 200°C (400°F) for 12 minutes, flip, cook another 8–10 minutes until deep golden. Then glaze and serve. The texture is crispier than baked and acceptable, but not the same as double-fried.
Where do I find rice syrup (mulyeot)?
Any Korean grocery store (H Mart, Lotte Plaza, H Fresh, 99 Ranch) carries it — typically near the cooking sauces and condiments, in a large plastic tub or bottle. It's inexpensive and lasts indefinitely in the pantry. If unavailable: light corn syrup is the closest substitute. Honey works but produces a softer, slightly more floral glaze that doesn't stay crisp as long.
Is this dish gluten-free?
When made with cornstarch or potato starch and with tamari or certified gluten-free soy sauce instead of regular soy sauce, the base recipe is gluten-free. Note that mirin can contain trace gluten depending on the brand, and mulyeot (rice syrup) is generally gluten-free but worth confirming on the label if cooking for someone with celiac disease. ```