
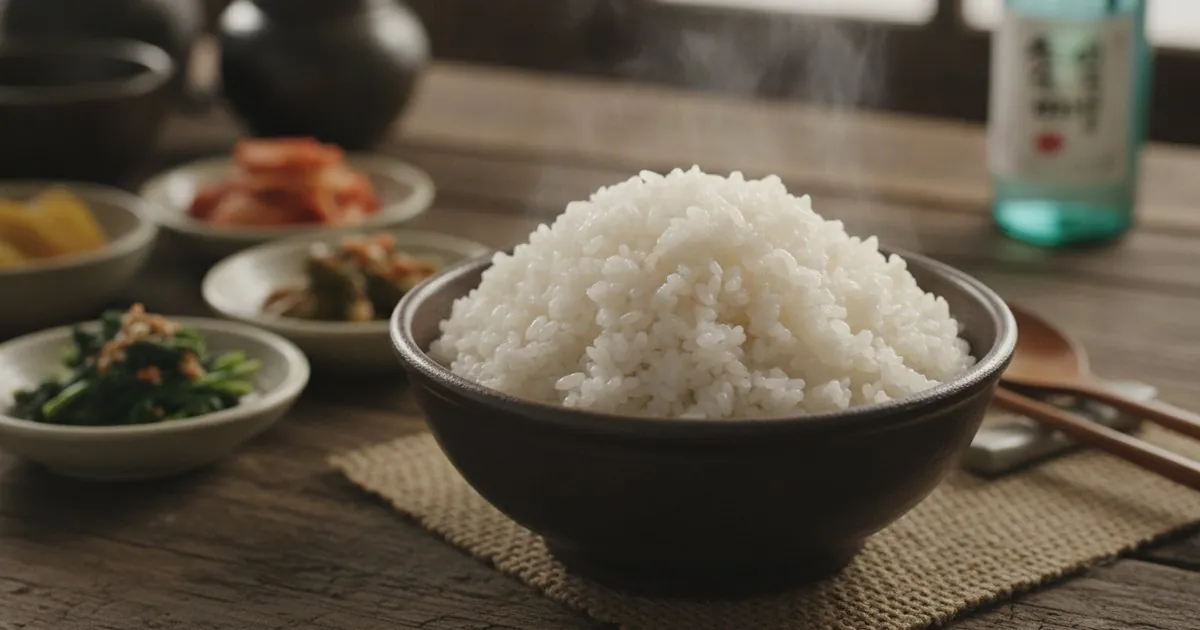
If there is a single thing that ties every Korean meal together — the steaming bowls of banchan, the sizzling plates at a Korean BBQ spread, the lunchboxes and the late-night soups — it is a bowl of perfectly cooked short-grain rice. Not fluffy and separate like basmati. Not dry and sticky like glutinous rice. Korean rice occupies its own precise middle ground: each grain is tender all the way through, with just enough cling that your chopsticks can grip a mouthful, yet the grains retain their individual shape and a gentle, subtly sweet fragrance.
Getting there is not complicated. But it is specific. There are a handful of steps — washing, soaking, the right water ratio, heat management — where the difference between “fine” and “genuinely great” rice is made. This guide walks through every one of them in detail, so that wherever you are cooking — a studio apartment in Chicago or a kitchen in London — you can produce a bowl of 밥 (bap) that would sit comfortably on a Korean table.
What Exactly Is Korean Short-Grain Rice?
Korean rice belongs to the japonica family of rice varieties. It is known in Korean as 백미 (baekmi), literally “white rice,” and the uncooked grain is called 쌀 (ssal), while the cooked result — which also functions as the general word for “a meal” — is 밥 (bap). That linguistic double meaning tells you something important: in Korean culture, rice is not a side dish. It is the meal.
Japonica grains are short, slightly rounded, and semi-translucent. They contain a higher ratio of amylopectin (a type of starch) compared to long-grain varieties, which is exactly what gives cooked Korean rice its characteristic soft cohesion. Swap in jasmine or basmati — both long-grain, high-amylose varieties — and you will get a completely different texture: grains that stay separate, that are fluffier and drier. That’s a fine result for Thai or Indian cooking, but it will not work for bibimbap or gimbap, where the rice needs to hold together just enough to function.
Finding the Right Rice (Western Kitchen Sourcing)
Look for bags labeled “Korean short-grain rice,” “Calrose,” or “sushi rice” — these are all japonica cultivars and will behave similarly. The most widely available brands in North America include:
- Koshihikari or Nishiki (widely stocked at Whole Foods, Costco, and mainstream supermarkets)
- Chucheong or Ilpum brands (found at H Mart and most Korean grocery stores — these are grown in the U.S. to Korean cultivation standards)
- Haiga-mai (partially milled, retaining the germ — a slightly nuttier flavour, excellent nutritional profile, used the same way)
If you have an H Mart nearby, picking up a Korean brand like Ottogi or CJ white rice is ideal. If you’re working with a mainstream supermarket, Nishiki or Calrose will do a solid job. The one thing to avoid: anything labeled “long-grain,” “jasmine,” or “basmati.”
A note on new-crop rice: Bags labeled “shinmai” or “햅쌀 (haepssal)” — new-harvest rice — are prized in Korea for their slightly sweeter, more fragrant flavor and naturally higher moisture content. If you find them (usually in autumn), reduce your water ratio slightly, as they absorb less than older-stored rice.
Step One: Washing the Rice (Don’t Skip This)
Washing rice is non-negotiable, and it goes beyond simple cleanliness. The surface of milled white rice is coated with excess starch dust that, if left on, will make your cooked rice gummy and slightly chalky-tasting.
How to wash it:
- Place your rice in a large bowl or directly in your pot. Add cold water generously.
- Swirl the rice gently with your hand — no aggressive scrubbing, which can break the grains.
- The water will immediately turn opaque white. Drain this first rinse immediately without letting it sit: the rice can re-absorb that starchy water quickly.
- Repeat 3–4 times, until the rinse water is mostly clear — a faint cloudiness is fine and normal. Perfectly crystal-clear water means you’ve over-washed and leached out too much surface starch, which affects texture.
The water should look like very diluted skim milk by the final rinse, not pure tap water.
Step Two: To Soak or Not to Soak
For stovetop cooking: soak. This is the step most Western recipes omit, and it makes a significant difference. Dry rice dropped straight into a hot pot cooks unevenly — the outside of each grain gelatinizes before the center has time to absorb water fully, resulting in cores that are slightly chalky or harder than the outside.
Soak your washed rice in fresh cold water for:
- 30 minutes in summer (warmer ambient temperature speeds absorption)
- 1–2 hours in winter (cold water absorbs more slowly)
After soaking, drain the water completely before adding your measured cooking water. The rice will have visibly swelled and turned from semi-translucent to an opaque, matte white — that’s your signal that it’s properly hydrated and ready.
For a rice cooker: soaking is optional but never harmful. The machine’s sealed, pressurized environment handles even, thorough cooking well enough without pre-soaking.
For a pressure cooker: do not soak. A pressure cooker traps all steam and adds significant cooking energy. Pre-soaked rice in a pressure cooker will emerge mushy and over-cooked.
Water Ratios: The Number That Changes Everything
This is where most first-time Korean rice cooks go wrong — usually by using the standard 1:2 ratio (one cup rice to two cups water) that applies to long-grain rice. That ratio will produce Korean rice that is wet, heavy, and gluey.
Stovetop Ratios
| Condition | Rice | Water |
|---|---|---|
| Soaked (standard) | 1 cup / 200g | 1 to 1.1 cups / 220–240ml |
| Not soaked | 1 cup / 200g | 1.25 to 1.5 cups / 295–355ml |
| New-crop (shinmai) | 1 cup / 200g | 1 cup / 235ml (even 1:1) |
| Old/stored rice | 1 cup / 200g | up to 1.5 cups / 355ml |
Rice Cooker
Most rice cookers intended for Japanese or Korean cooking have internal markings calibrated for japonica rice — use the inner line for white rice, which is approximately a 1:1 ratio (the sealed appliance retains far more steam than a stovetop pot). If your cooker doesn’t have Korean-style markings, start with 1 cup rice to 1.1 cups water (200g rice / 260ml water).
The Traditional Knuckle Method
Place your palm flat on the surface of the leveled rice in the pot. Add water until it reaches the first knuckle joint of your index finger. This intuitively accounts for pot diameter and rice quantity at the same time — a piece of practical kitchen wisdom that holds up. It assumes your hand is resting gently on the rice, not pressing down.
Stovetop Method: Step-by-Step
A heavy-bottomed pot is essential here — a thin-walled saucepan will develop hot spots and scorch the bottom before the center grains cook through. A 3-quart (2.8L) Dutch oven, a donabe (Japanese clay pot), or a stainless steel pot with a thick base all work well.
-
Add drained, soaked rice and measured water to your pot. Cover with a tight-fitting lid.
-
High heat until boiling (5–8 minutes). You’ll hear a rapid bubbling and may see the lid beginning to jiggle — this is normal. The water is being absorbed and the grains are expanding rapidly.
-
Reduce to medium heat (7–8 minutes). The sound changes: the vigorous bubbling quiets to a steady, lower simmer. Starch gelatinization is happening through the grain. Resist lifting the lid — every time you do, you release steam and throw off the water balance.
-
Reduce to the lowest possible heat (3–5 minutes). The surface of the rice will look dry and pocked with small steam holes — like the surface of a lava field. The water has nearly all been absorbed.
-
Turn off the heat completely and let steam, lid on, for 10–15 minutes. This is non-negotiable. The residual steam finishes cooking each grain uniformly from the inside out. Lifting the lid before this stage is the single most common reason for unevenly cooked rice.
-
Fluff gently with a rice paddle (주걱, jugeok). Use a cutting and folding motion from the bottom of the pot upward — don’t stir in circles. A rice paddle’s broad, flat face handles the grains far more gently than a fork. The rice should separate easily into individual grains while still clumping lightly when pressed — that’s exactly the texture you want.
Sensory checkpoint: When you lift the lid after steaming, the rice surface should look glossy, not wet. Each grain should be plump and slightly translucent at the edges. The aroma should be clean and lightly sweet — a faint nuttiness. If you smell something acrid or toasty from the bottom, the heat was too high.
Rice Cooker Method
A dedicated rice cooker produces excellent results with very little attention required. Wash the rice as described above. Add rice and water to the inner bowl using the appliance’s built-in lines (white rice setting). Press cook. When the machine switches to “warm,” let it sit for an additional 10 minutes on warm before opening — this mimics the stovetop resting stage and significantly improves texture.
Storing and Reheating
Cooked Korean rice refrigerates well for up to 3 days and freezes beautifully for up to 1 month. For freezing, portion still-warm rice into individual servings in airtight containers or zip bags. To reheat from frozen: microwave covered with a damp paper towel for 2–3 minutes, or steam over boiling water for 5 minutes. The damp environment prevents the grains from drying out and turning chalky.
Day-old refrigerated rice is actually preferred for some preparations — it firms up slightly, making it ideal for fried rice where you want individual, non-clumping grains.
Common Mistakes to Avoid
1. Using too much water
The 1:2 ratio (rice to water) is standard for long-grain rice — applying it to Korean short-grain produces wet, heavy, gluey results. The grains lose their individual shape and stick together in dense clumps. Fix: Drop down to 1:1.1–1.2 for soaked rice. If your rice comes out wet, reduce by 2 tablespoons (30ml) next time until you dial in your specific pot and rice brand.
2. Lifting the lid during cooking or resting
Every time you open the pot, steam escapes and the carefully managed moisture balance inside is disrupted. The top layer of rice will dry out and the bottom will overcook trying to compensate. Fix: Trust the process. Set a timer and keep the lid on. If you genuinely need to check, do it only once during the medium-heat simmer phase, quickly.
3. Skipping the resting stage
Pulling rice off the heat and serving immediately — skipping the 10–15 minute covered rest — gives you rice that is slightly wet on top and unevenly cooked in the lower layers. The center of the pot is fine; the edges are dry; the top is still steamy. Fix: Rest is not optional. Set a 12-minute timer after turning off the heat. The difference is dramatic.
4. Skipping washing (or over-washing)
Unwashed rice carries surface starch that makes the cooked result gummy and flat-tasting. But over-washing — more than 4–5 rinses until the water is completely clear — strips away too much surface starch, leaving grains that don’t cling at all and lack their characteristic subtle sweetness. Fix: Stop when the water is pale milky-cloudy, not crystal clear.
5. Using the wrong rice variety
Long-grain rice cooked to these specs will not produce Korean-style texture — the amylose content is too different. You will get separated, fluffy grains with no cohesion. Fix: Make sure your bag says “short-grain,” “Calrose,” “Koshihikari,” or specifically “Korean rice.” If you are in doubt at the grocery store, check the grain shape in the bag — short-grain japonica is noticeably rounder and shorter than jasmine or basmati.
6. Cooking in a thin-bottomed pot
A cheap, thin-walled saucepan creates hot spots that scorch the bottom layer of rice while the top layer is still undercooked. You’ll smell it before you can fix it — that sharp, slightly burnt starch smell through the lid is your warning. Fix: Use a heavy-bottomed pot. If you only have thin pots, keep the heat lower throughout and add a thin heat diffuser if possible.
FAQ
Q: Can I use a regular pot instead of a rice cooker?
Absolutely — and many Korean home cooks prefer the stovetop method for its slightly firmer texture and the optional crispy bottom layer (누룽지, nurungji) that forms in a heavy pot. A rice cooker just makes it more hands-off. Both produce excellent results when the ratios and timing are followed correctly.
Q: Why does my rice turn out mushy on the bottom and firm on top?
This almost always means either too much water was used or the heat was too high during the initial boil, driving all the water down into the bottom of the pot before the top grains could absorb it properly. Try reducing your water by 2 tablespoons (30ml) and lowering the heat slightly after bringing to a boil.
Q: Is “sushi rice” the same as Korean rice?
They are both japonica short-grain rice and cook identically. “Sushi rice” refers specifically to cooked japonica rice that has been seasoned with vinegar, sugar, and salt — the variety of grain itself is the same. Uncooked, they are interchangeable.
Q: Can I add salt to the cooking water?
Traditional Korean plain rice is cooked unsalted — the flavor comes from the rice itself and is calibrated to complement the bold, savory flavors of banchan and soups. If you are cooking rice to eat on its own or find the flavor flat, a very small pinch (less than ¼ tsp / 1g per 1 cup rice) is fine, but it’s not standard.
Q: How do I get that crispy bottom layer (nurungji)?
After your rice is done and resting, turn the heat back to its lowest setting for the final 2–3 minutes before you turn it off for good. You’ll hear a faint, dry crackling sound from the bottom — that’s the nurungji forming. It should smell toasty and nutty, not burnt. The crispy layer scrapes off easily and is eaten as a snack, or you can add hot water to the pot and let it soak into a thin porridge called 숭늉 (sungnyung) — a traditional Korean post-meal drink.
Perfectly cooked Korean rice is genuinely one of the most satisfying things to get right in a home kitchen. The technique is learnable in a single weekend, and once you understand what the rice is supposed to look, smell, and feel like at each stage, you’ll find you can make adjustments intuitively. From there, every Korean dish you cook — from a quick weeknight bowl topped with banchan to a weekend bibimbap project — will have a foundation worth building on.